
Steps to install OATS – Oracle Application Testing Suite had been same until OATS 12.5.0.3 had come in to existence, i.e. by downloading OATS software and follow the GUI instructions to complete the installation. But as part of the latest version OATS 12.5.0.3 there is a slight modification, which is to first install Oracle XE or EE database and then install OATS.
Note: The installation process is same even for latest versions like OATS 13.3.0.1
Assuming that you are aware of installing Oracle XE Database, you could either install XE or EE database, but for our scope in testingtools.co articles we have considered Oracle XE 11g Database, if you are new to installation, you could go through the detailed steps to install Oracle XE 11g database(i.e. any latest XE Database of Oracle) make sure to note down the password that you have given during installation of database, it is highly important for you in the next step of installing OATS 12.5.0.3 – especially if you want to have Oracle Test Manager and Oracle Load Testing.
It is also important to make sure that you have done a clean uninstall of OATS, in case you had OATS in your machine previously. We have created detailed steps to clean uninstall of OATS for your reference.
Steps to install OATS 12.5.0.3
You could either follow the below video for complete steps of OATS installation or follow the detailed steps drafted in this article.
- Navigate Download OATS page & click on 64 bit windows installation based version of OATS in the list, you would be navigate to Oracle website to download the software.
- Click accept agreement radio button, you might be asked to login in Oracle SSO, in case you are not logged in, login to Oracle SSO ( if you are not registered yet, register for free at oracle website, steps are pretty straight forward. )
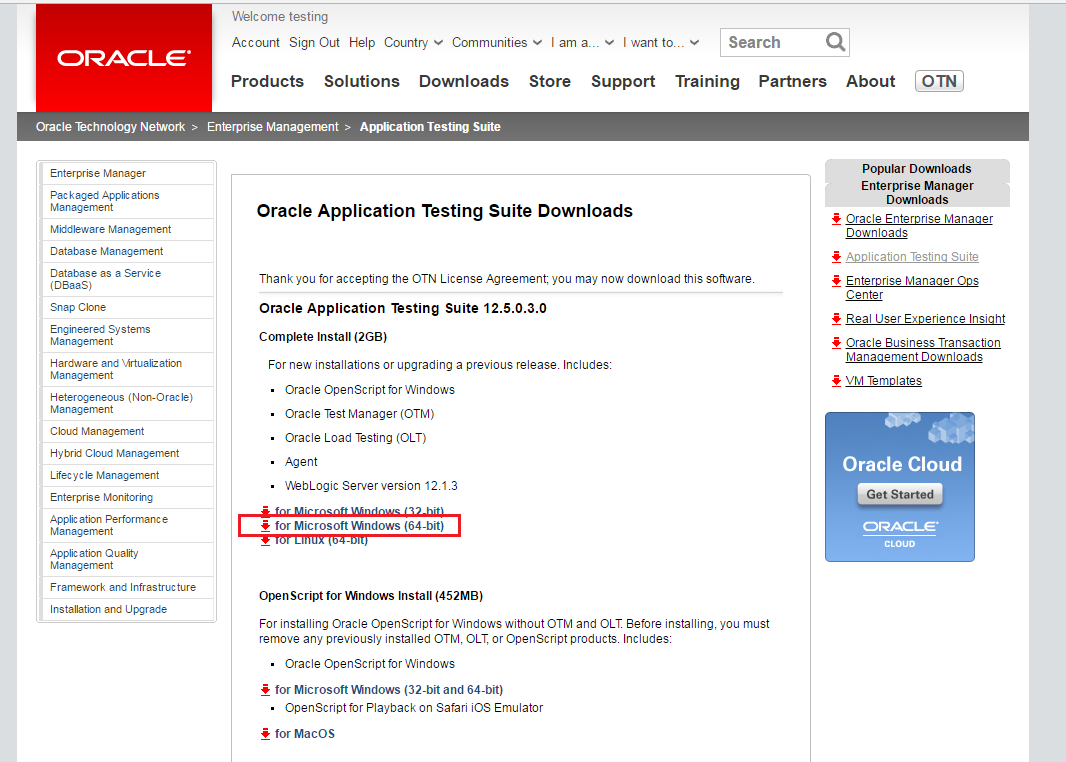
- Click on desired link , for the scope of this article, you need to click on “for Microsot Windows (64-bit)” link
- Remember that this is a huge file, better to have good internet connection. ‘
- Once the download is complete, unzip the folder.
- Navigate to the installation folder and right click on “Setup.bat” file and select “Run as administrator” option, in case you are presented with a security popup window, click on “Yes” button to proceed.
- You would be presented with “Oracle Universal Installer” window

- Click on Next button to start installation process.
- You would be asked to chose the Installation Type, it could either “Custom” / “Complete”, if you are looking to install only few components in OATS i.e. only for “Test Manager” / “Load Testing” / “Functional Testing”, you need to select “Custom” option and then select appropriate components to start the installation.
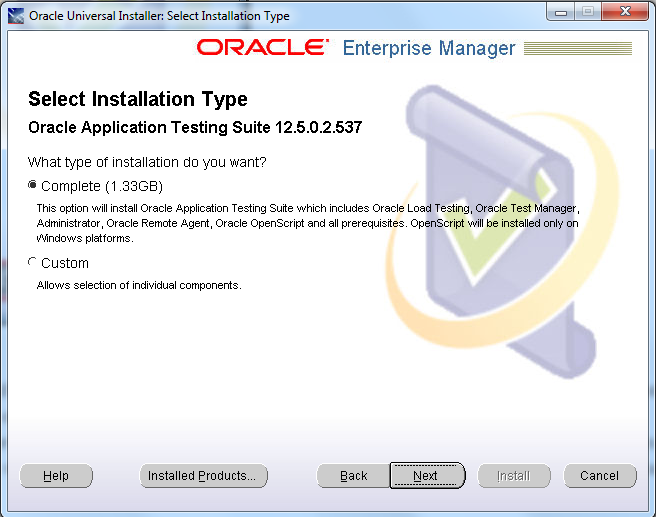
- As part of this article, you need to choose “Complete” option and click on Next button, this will lead to installation of all components of OATS.
- Give your desired installation folder, by default you would have “C:\OracleATS” as the installation folder, click Next button to continue installation.

- You would be prompted to provide a master password for OATS, this is basically the password that you will use to login in to Oracle Test Manager for the default user “administrator”, please make a note of the given password and save it where you can refer to again whenever required or memorise for future usage.

- Click on Next button.
- You would be prompted to chose either configure existing Oracle XE database or to configure it manually at a later stage.

- For the scope of this article, chose the option to configure Oracle XE database and click Next button.
- You would be prompted to enter the details to login Oracle XE Database, most of the details are pre-filled, you need to enter the password that you have given while installing the database and click on Next button.

- Click on Install button to start the installation process, this might take a while to complete the installation of OATS.

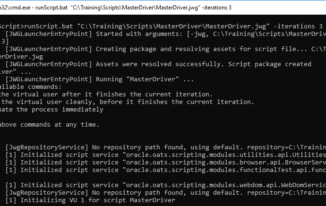
- In between of the process a couple of Command Prompt windows might open and get closed, no need to worry about those and wait till the installation gets completed.
- Once you are done you would be presented with a Confirmation message that installation is successful. Click Finish button to complete and close the window.
Hope this article has been helpful for you to install Oracle Application Testing Suite, in case you face any challenges and unable to take it forward, please feel free to reach out to us in form of comments, we would be more than happy to help you.
Once you are done with installation, we recommend you to go through 4 verification steps of successful installation of OATS and is ready for test automation