
Now that you have created your first project in android studio and added all the required selenium libraries, you will now see how to create your first test automation script to automate mobile app testing, you will also be introduced to the code that you need to write in selenium @ android studio, for this automation to work.
Steps to create your first test automation script – mobile app testing
- Expand the tree node in Project view to : {projectname] >app > src > test > java > {packagefolder}
- Right click on the package ( ex: com.appium.tt.mobiletestautomation , based on the names given during creation of andorid project in android studio article), select the menu options New > Java Class
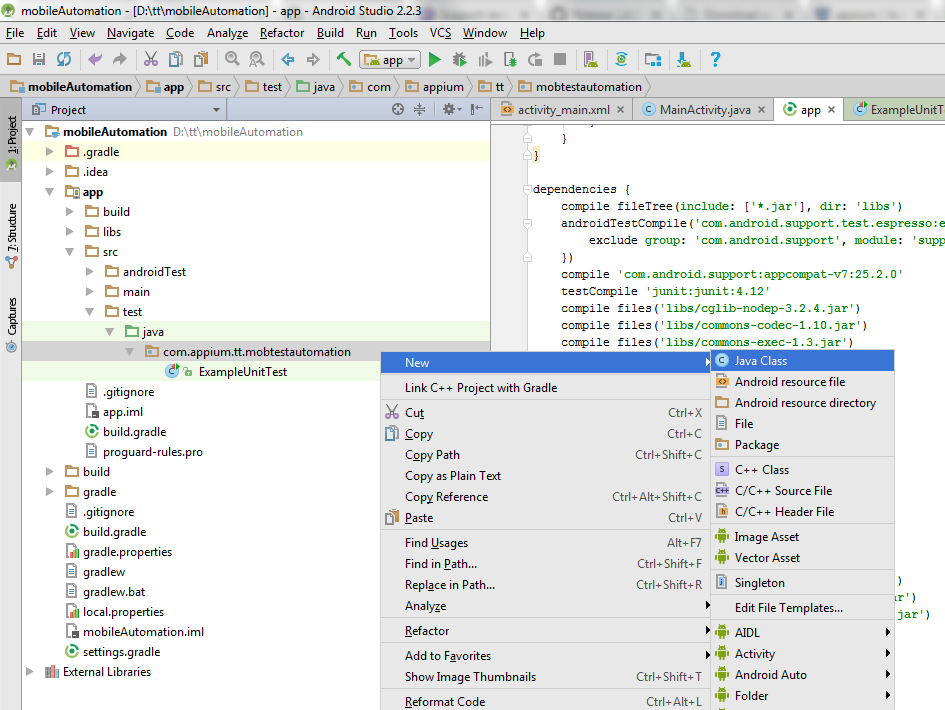
- You will be presented with a “Create New Class” window, enter a class file name as per your interest, ex: TestCalc_MobileEmulator and click OK button, you can leave other fields to default values.

- Copy below code and paste it in the newly created java file
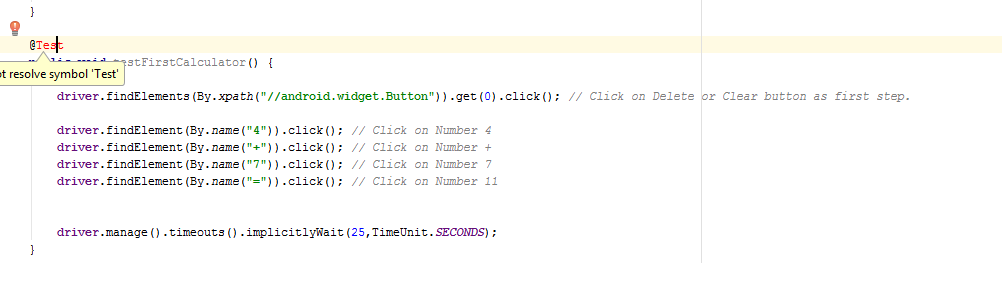
import java.net.MalformedURLException; import java.net.MalformedURLException; import java.net.URL; import java.util.concurrent.TimeUnit; import org.junit.After; import org.junit.Before; import org.openqa.selenium.By; import org.openqa.selenium.WebDriver; import org.openqa.selenium.remote.CapabilityType; import org.openqa.selenium.remote.DesiredCapabilities; import org.openqa.selenium.remote.RemoteWebDriver; import org.openqa.selenium.support.ui.ExpectedConditions; import org.openqa.selenium.support.ui.WebDriverWait; public class TestCalc_MobileEmulator { WebDriver driver; @Before public void setUp() throws MalformedURLException { DesiredCapabilities capabilities = new DesiredCapabilities(); // Created object of DesiredCapabilities class. capabilities.setCapability("deviceName", "Android Emulator"); // Set android deviceName desired capability. Set your device name. capabilities.setCapability(CapabilityType.BROWSER_NAME, "Android"); // Set BROWSER_NAME desired capability. As we are running on Android Emulator, It's Android. capabilities.setCapability(CapabilityType.VERSION, "7.0"); // Set Android's OS VERSION @ desired capability. capabilities.setCapability("platformName", "Android"); // Set platformName desired capability to Android. capabilities.setCapability("appPackage", "com.android.calculator2"); // Set your application's package. capabilities.setCapability("appActivity", "com.android.calculator2.Calculator"); // Set your application's MainActivity. driver = new RemoteWebDriver(new URL("http://127.0.0.1:4723/wd/hub"), capabilities); // Create driver, set the Appium Server details. driver.manage().timeouts().implicitlyWait(20, TimeUnit.SECONDS); } @Test public void testFirstCalculator() { driver.findElement(By.name("4")).click(); // Click on Number 4 driver.findElement(By.name("+")).click(); // Click on Number + driver.findElement(By.name("7")).click(); // Click on Number 7 driver.findElement(By.name("=")).click(); // Click on Number 11 driver.manage().timeouts().implicitlyWait(25,TimeUnit.SECONDS); } @After public void End() { driver.quit(); } } - You may have to change the values for capabilities based on the Mobile Emulator’s Android version, name, etc..
- Click Save, in case you see any error like below, i.e.e @Test or @Before or @After in red mark, you need to keep your cursor inside the text and press Alt+Enter, doing this will ask you to import packages from junit, go and ahead do the same and you are all set with the test script creation.
As you are using desired capabilities of Selenium, you need not include the appium client java jar file to the project, but if you want to work with mobile capabilities you will need to include the relevant jar files, similar to how you added selenium libraries, which is clearly mentioned in the article configure android project with selenium libraries.
In case you have any queries, we request you to ask them through comments and we would be more than happy to respond back to you with any solutions.
Now that you have created the test script, next steps would be to execute the script, but in order to execute the script you need to have the Appium server running and Mobile emulator up and running, you will be learning about this in the next articles.